Create Kubernetes clusters
Create one or more Kubernetes clusters within your space.
During creation, define the characteristics of each cluster:
- name
- Kubernetes version
- CIDR (Classless Inter Domain Routing)
- visibility
- default node pool profile: performance, RAM size and number of vCPU (virtual Central Processing Unit)
Once the cluster is created, retrieve the kubeconfig file to connect via the kubectl command.
Permissions
This action requires the following IAM (Identity and Access Management) permissions:
- kubernetes.cluster.create
The choice between a Private and a Public network determines who can access your cluster:
-
Private: your cluster is only accessible within the internal Numspot network. Only your other resources located in the same network can connect to it. This option is recommended for production environments, particularly SecNumCloud environments. To access it securely, you can use a bastion VM and a Numspot VPN (Virtual Private Network).
-
Public: your cluster is accessible from the Internet. Anyone with the connection credentials can connect to it, wherever they are. This option is suitable for development, testing or environments where network security is not critical.
Recommendation: To ensure the security of your data in production, always favor the Private network.
- Console
- API
- Terraform
-
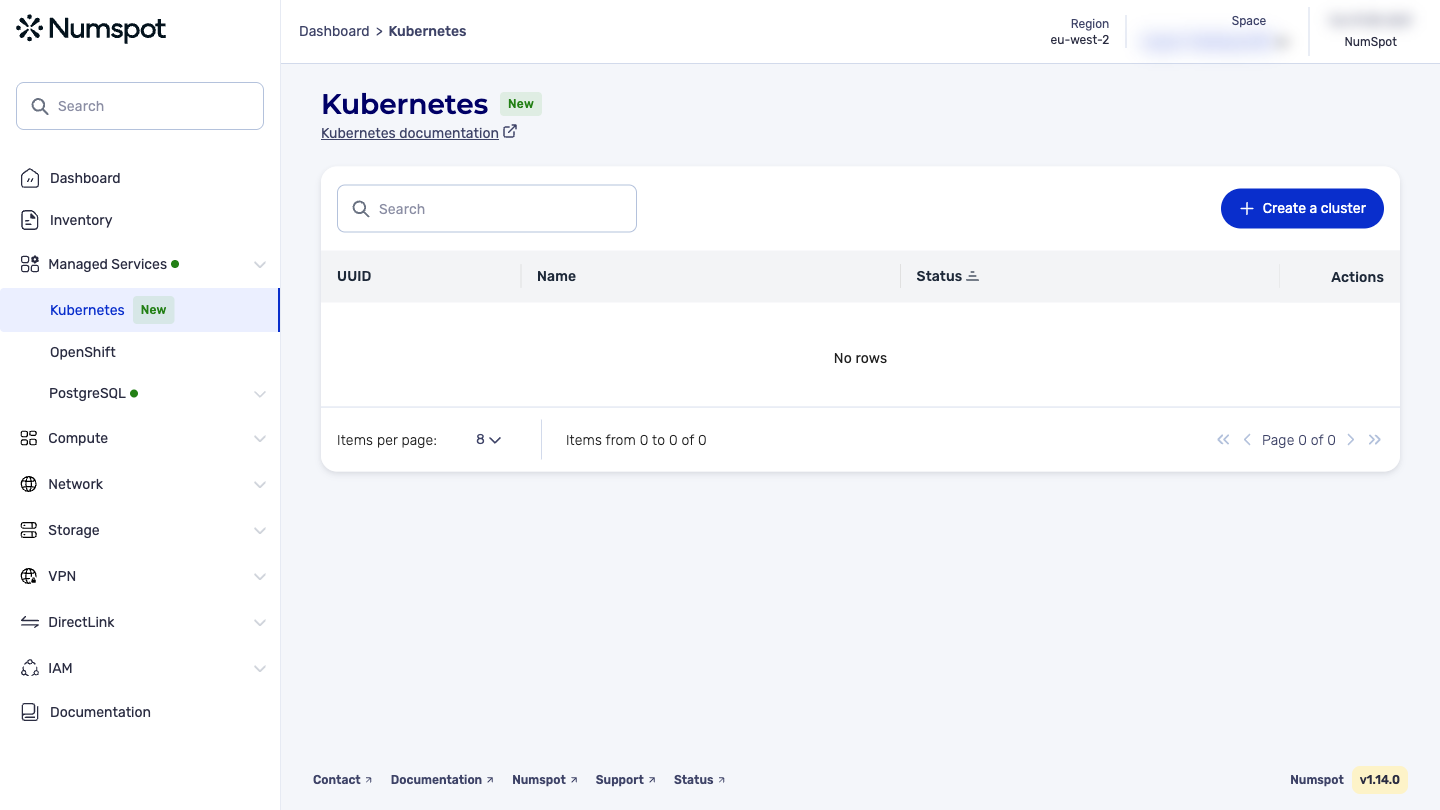
From the left-hand side menu, click Managed Services → Kubernetes to access the list of Kubernetes clusters.
-
Click the Create a cluster button at the top right of the screen to launch the Kubernetes cluster creation wizard.
Cluster name
Specify a name that will allow you to identify your Kubernetes cluster. This name must meet the following criteria:
- length: between 3 and 63 characters;
- allowed characters: only letters (a-z, A-Z), numbers (0-9), hyphens (
-) or underscores (_); - structure:
- it must start and end with an alphanumeric character;
- hyphens (
-) or underscores (_) cannot be consecutive or placed at the start or end of the name.
Valid example: my-cluster_Kubernetes-2026.
Cluster configuration
-
Select the desired Kubernetes version. The most recent version is selected by default.
-
Enter the IP range of your cluster in CIDR format.
The IP address range is used to assign addresses to the cluster nodes. It must not overlap with another existing range to avoid network addressing conflicts. The subnet mask must be between /16 and /20.
- Expected format:
IP address / subnet mask - Common example:
192.168.1.0/16
- Expected format:
-
Select the network type from the following options:
- Private: the cluster is accessible only from the internal network.
- Public: the cluster is accessible from the Internet via a public IP address;
Control plane sizing
Select the control plane size suited to your needs.
The XS profile is strictly reserved for testing and experimentation. Due to its very limited resources, it is strongly advised against using it in production.
| T-shirt size | Max vCPU | Max RAM | Recommended number of nodes |
|---|---|---|---|
| XS | 250m (0.25 vCPU) | 512 Mi | Up to 5 nodes (testing only) |
| S | 250m (0.25 vCPU) | 1 Gi | Up to 20 nodes |
| M | 500m (0.5 vCPU) | 2 Gi | Up to 50 nodes |
| L | 1 vCPU | 4 Gi | Up to 100 nodes |
The recommended number of nodes is estimated from the API-server limits. The denser the cluster (pods, services, API requests), the more these thresholds must be adjusted downwards.
Node pool configuration
Creating a Kubernetes cluster via the console also includes creating the first node pool of this cluster.
- Specify a name that will allow you to identify your node pool. This name must meet the following criteria:
- length: between 3 and 63 characters;
- allowed characters: only letters (a-z, A-Z), numbers (0-9), hyphens (
-) or underscores (_); - structure:
- it must start and end with an alphanumeric character;
- hyphens (
-) or underscores (_) cannot be consecutive or placed at the start or end of the name.
Valid example: my-node_pool-2026.
-
Select the availability zone of your node pool.
-
Select the node type of your node pool. All the nodes of a node pool have the same type.
-
Select the system volume type from the following options:
- Magnetic: economical magnetic volume, suited to uses with low read/write intensity;
- Performance: high-performance SSD for production;
- Enterprise: SSD with 300 IOPS (Input/Output Operations Per Second) per GiB guaranteed for critical workloads.
-
Enter the system volume size required for your node pool. For an Enterprise volume, also enter the desired number of IOPS, between 1000 and 13000.
-
Enable autoscaling if you wish and enter the minimum and maximum numbers of nodes. The number of nodes can vary between 1 and 20.
If you do not want to enable autoscaling, simply enter the number of nodes required - between 1 and 20.
Cluster creation
To finalize the cluster creation, click the Create button.
You are redirected to the cluster details page. Your cluster is then being created. Its status will update as soon as it is operational, after only a few minutes.
The POST /kubernetes/spaces/{spaceId}/clusters command lets you create and launch a Kubernetes cluster.
- States: The cluster moves from "pending" to "running" once created.
Choosing the network type:
- Public: specify
"visibility": "EXTERNAL" - Private: specify
"visibility": "INTERNAL"
Example request
{
  "name": "my-cluster-kubernetes",
  "version": "1.34",
  "cidr": "192.168.1.0/24",
  "visibility": "EXTERNAL",
  "profile": "small"
}
Example response
{
  "id": "550e8400-e29b-41d4-a716-446655440000",
  "name": "my-cluster-kubernetes",
  "version": "1.34",
  "fullVersion": "1.34.0",
  "cidr": "192.168.1.0/24",
  "visibility": "EXTERNAL",
  "profile": "small",
  "createdOn": "2026-04-05T10:30:00Z",
  "status": {
    "state": "CREATING",
    "message": "Cluster is being created"
  }
}
To create a Kubernetes cluster with Terraform, use the following resource block:
resource "numspot_kubernetes_cluster" "mon_cluster" {
  space_id   = var.space_id
  name       = "my-cluster"
  version    = "1.34"
  cidr       = "10.0.0.0/16"

  node_pool {
    name          = "default-pool"
    node_type     = "standard-2"
    min_nodes     = 1
    max_nodes     = 3
    auto_scaling  = true
  }
}
Key parameters
| Parameter | Description | Example |
|---|---|---|
space_id | ID of the Numspot space where the cluster is created. | "sp-123456" |
name | Cluster name (1-63 characters, lowercase letters, numbers, hyphens). | "my-cluster-prod" |
version | Kubernetes version (e.g. 1.34). | "1.34" |
| cidr | CIDR range for the cluster (e.g. 10.0.0.0/16). | "10.0.0.0/16" |
node_pool | Node pool configuration (type, autoscaling, etc.). | See the block above. |
Next steps
- Initialize Terraform:
terraform init
- Apply the configuration:
terraform apply
Make sure you have the required IAM permissions:
Kubernetes.ClusterCreateKubernetes.NodePoolManageSee the Numspot Terraform documentation for more details.