Create a user
This operation is performed via the Console or via the API.
For the API, you must first create a service account.
Once created, you must generate an activation link for the user so that they can set their password and two-factor authentication.
Permissions
This action requires the following IAM (Identity and Access Management) permissions:
- iam.user.create
- Console
- API
- Terraform
-
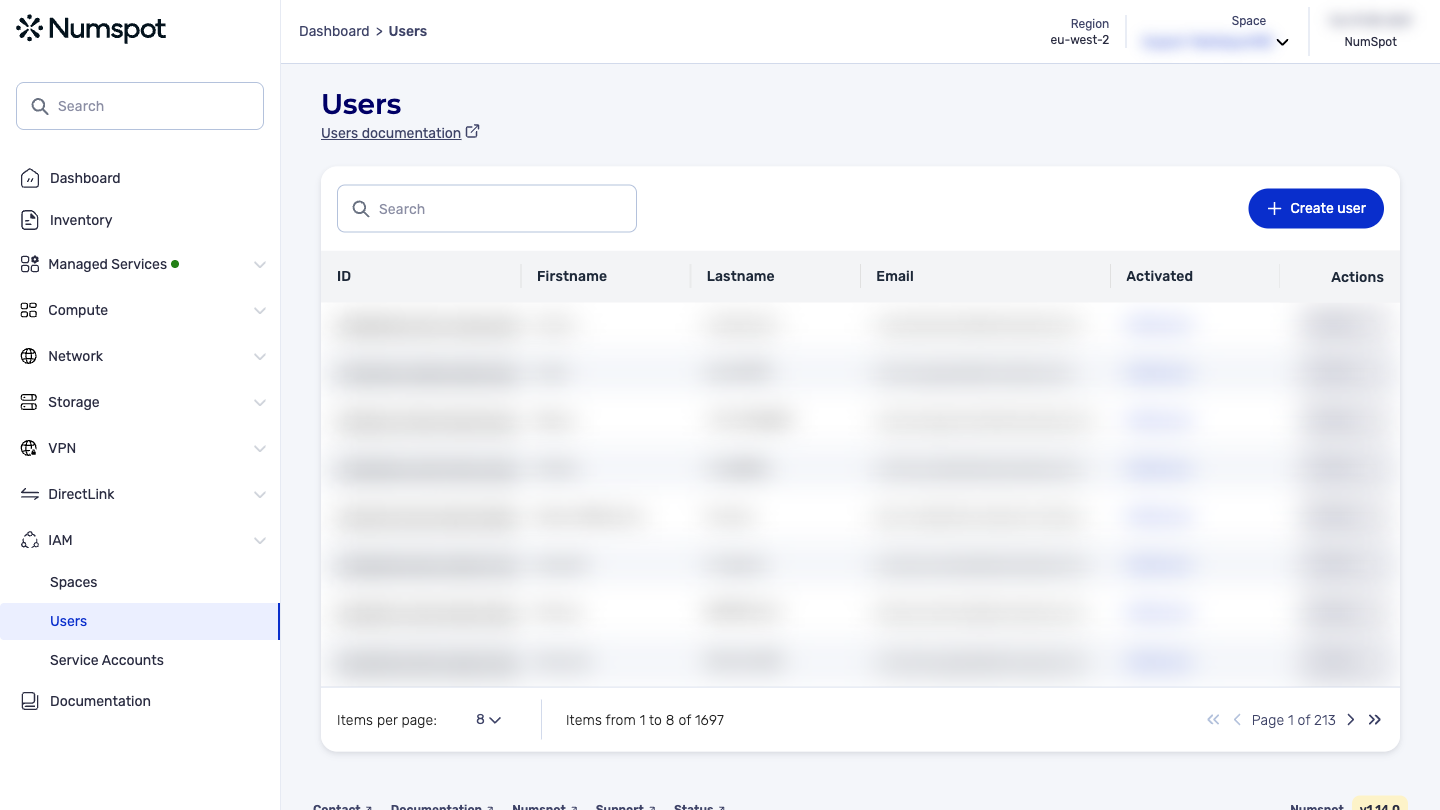
In the IAM menu, click Users. You access the dashboard dedicated to users.
-
In this interface for managing Users, click the Create a user button. A new window appears.
-
Type the last name, the first name and the email address in the corresponding fields.
To confirm this information, click the Create and assign roles and permissions button. -
Choose the spaces to associate with the user, then click the Assign the spaces button, then Continue.
-
In a new view, choose the roles to assign to this user. Once selected, click the Save and continue button.
You can restrict the roles to one or several spaces.
- In this new view, choose the permissions to assign to the user.
You can restrict the permissions to one or several spaces.
- Click the Save and exit button to confirm the creation of the user.
After the user is created, you are redirected to the User details page.
The configuration of the user's rights is now complete. A new activation link must be generated so that this new user can carry out the steps of the first connection to their space.
-
You can create a new user from the details page of an already created user with the Create a user from this profile action.
-
A user creation page is displayed. It specifies that, in this particular case, the new user will have the same rights as the initial user.
Create a user within an organization
Example:
curl 'https://api.{region}.numspot.com/iam/organisations/{organisationId}/users' \
  --request POST \
  --header 'Content-Type: application/json' \
  --data '{
  "email": "john.smith@acme.org",
  "firstname": "",
  "lastname": ""
}'
Response:
{
  "email": "john.smith@acme.org",
  "firstname": "…",
  "lastname": "…",
  "id": "123e4567-e89b-12d3-a456-426614174000",
  "active": true,
  "createdOn": "2018-11-13T20:20:39+00:00"
}
See the page on using the API for the implementation.
Create a user within a space
https://docs.numspot.com/openapi/#tag/identity-access-management/POST/iam/spaces/{spaceId}/users
Example:
curl 'https://api.{region}.numspot.com/iam/spaces/{spaceId}/users' \
  --request POST \
  --header 'Content-Type: application/json' \
  --data '{
  "email": "john.smith@acme.org",
  "firstname": "",
  "lastname": ""
}'
Response:
{
  "email": "john.smith@acme.org",
  "firstname": "…",
  "lastname": "…",
  "id": "123e4567-e89b-12d3-a456-426614174000",
  "active": true,
  "createdOn": "2018-11-13T20:20:39+00:00"
}
See the page on using the API for the implementation.
Assign roles and permissions to a user within an organization
Example:
curl 'https://api.{region}.numspot.com/iam/organisations/{organisationId}/iampolicy/{subjectType}/{subjectId}' \
  --request PATCH \
  --header 'Content-Type: application/json' \
  --data '{
  "add": {
    "roles": [
      ""
    ],
    "permissions": [
      ""
    ]
  },
  "delete": {
    "roles": [
      ""
    ],
    "permissions": [
      ""
    ]
  }
}'
Assign roles and permissions to a user within a space
Example:
curl 'https://api.{region}.numspot.com/iam/spaces/{spaceId}/iampolicy/{subjectType}/{subjectId}' \
  --request PATCH \
  --header 'Content-Type: application/json' \
  --data '{
  "add": {
    "roles": [
      ""
    ],
    "permissions": [
      ""
    ]
  },
  "delete": {
    "roles": [
      ""
    ],
    "permissions": [
      ""
    ]
  }
}'
The Terraform documentation is available on the Numspot registry ↗.