Quickstart
Numspot lets you create virtual machines (VM) and connect to them remotely using SSH (Secure Shell).
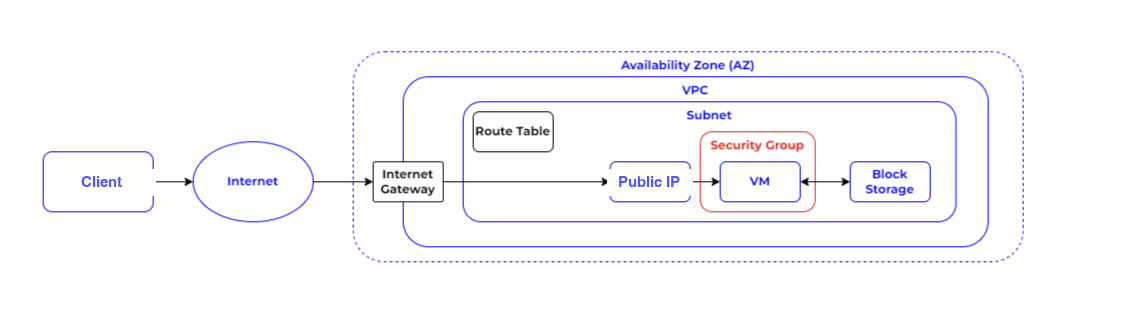
By following this tutorial, you will implement some of the components needed to build an application ranging from simple to very complex, in a secure way. Before getting started, take a look at the diagram below. It reveals all the components you will need to create your own VM at Numspot.
1. Create a VM
-
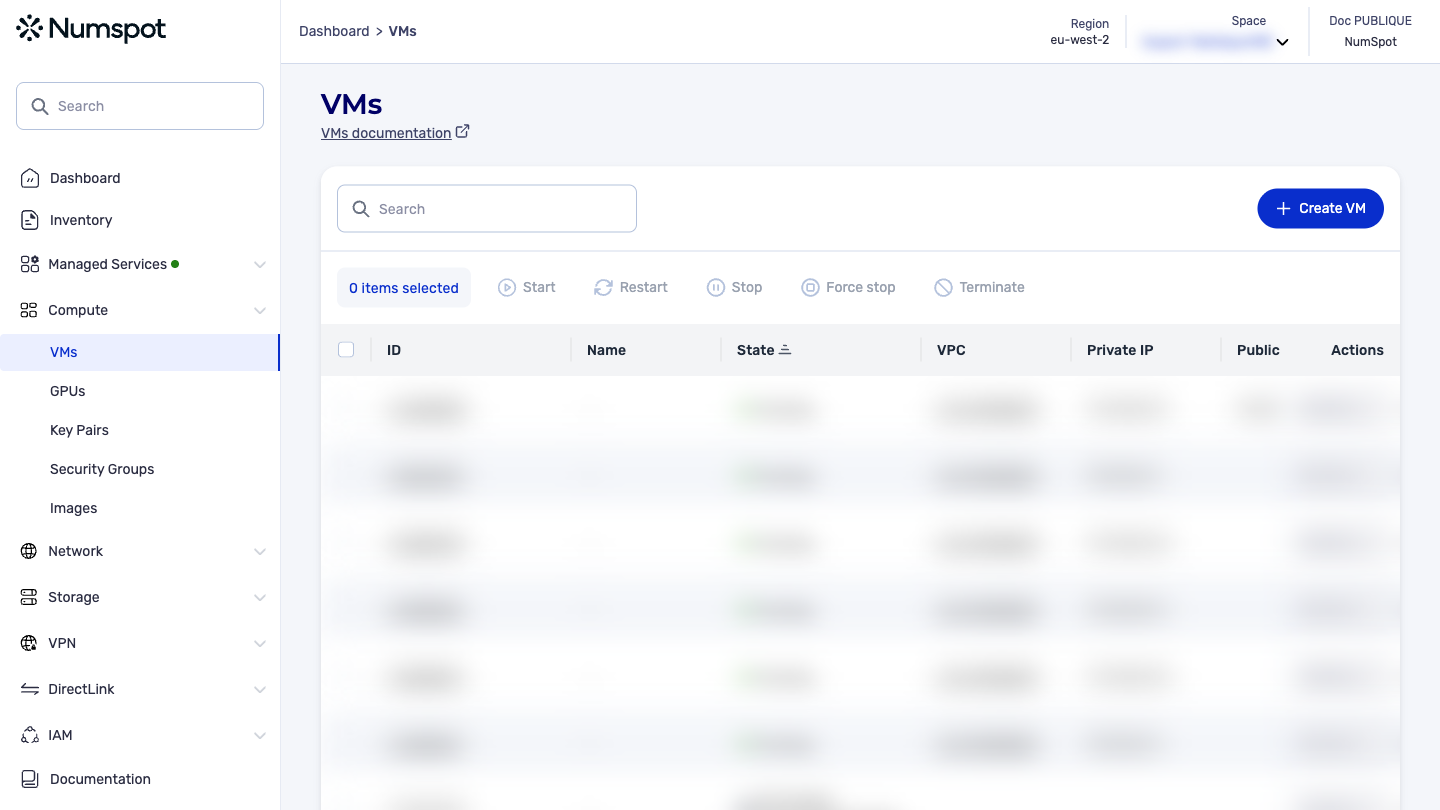
From the console, in the left-hand menu, click Compute → VM to access the list of VM.
-
Click the Create a VM button at the top right of the screen to launch the VM creation wizard.
Creating a VM on the Numspot cloud is simplified by a creation wizard that guides you through each configuration step.
At each step, a summary of the selected options is displayed on the right-hand side of the screen, including the total estimated cost of the resources added. This lets you manage the costs of your VM and ensure they stay within your budget.
Here are the steps to create a VM using the wizard:
Choose an image
- Select the OS image you want to use for your VM.
- Click Continue
The VM screen appears.
Choose a VM type and the number of VM
-
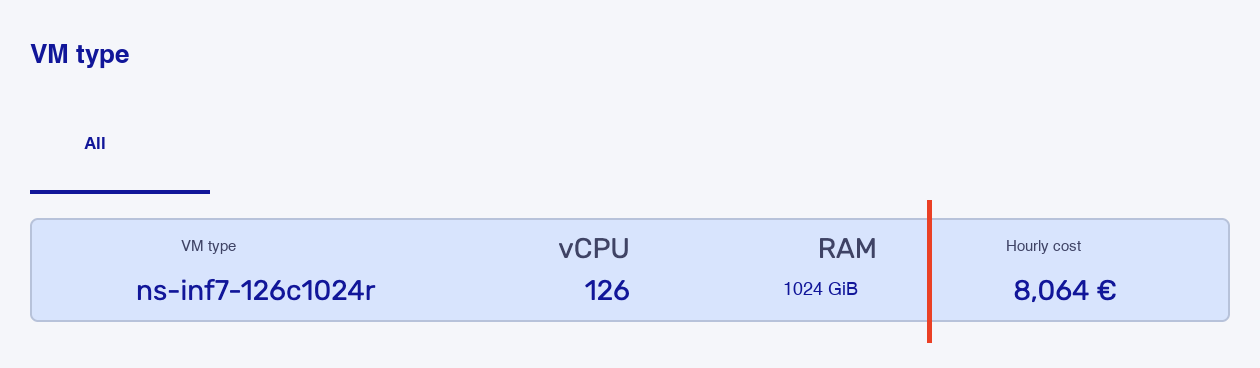
Select the type of VM you want to create.
tipNumspot offers VM templates optimized for various use cases, such as compute, memory, standard, economy and inference.
- Compute: optimized for applications requiring high processing power.
- Memory: optimized for applications requiring a large amount of RAM.
- Standard: suitable for most use cases.
- Economy: ideal for low-cost applications.
- Inference: optimized for AI inference.
-
Select the number of VM you want to create
info- You can choose to create several VM simultaneously (up to a maximum of 20, subject to your quota).
- You can quickly deploy your infrastructure by creating several VM at once.
- A summary of the selected options, with the total estimated cost, is displayed on the right-hand side of the screen. This lets you track the costs associated with your VM.
-
Click Continue.
General information and Network
Choose a name and an allocation option.
-
In the VM name field, enter the name you want to assign to your VM.
warningThis name must contain between 1 and 255 printable ASCII characters
infoThis name is used as a tag associated with your VM.
-
Dedicated VM tenancy:
Tick the Dedicated VM tenancy box only if you want to create dedicated VM.
infoA dedicated VM benefits from dedicated hardware resources, for an additional cost.
-
Configure the network: When you configure the network for your VM, this refers to the virtual private network (VPC), you have two options:
-
Choose an existing VPC:
- select an existing VPC from the drop-down list if you have already created a VPC in your space.
- choose an existing subnet from the Subnet drop-down list.
-
Create a new network:
If you have not yet created a network or if you want to create a new network for your VM, you can click the Create a VPC button. This opens a dialog box in which you can create a new VPC and a new subnet for your VM.- Create the VPC:
- select the AZ (Availability Zone) in which you want to deploy your VM
- in the VPC name field, choose an identifiable name for your VPC.
- enter the CIDR (Classless Inter-Domain Routing). Define the IP (Internet Protocol) address range for your VPC.
- Create the subnet:
- in the Subnet name field, choose an identifiable name for your subnet.
- enter the CIDR to define the IP address range of your subnet.
info- the CIDR block of the subnet must be included in the CIDR block of the VPC.
- if you create several subnets in a VPC, their CIDR blocks must not overlap.
- Click Create the Network
- Create the VPC:
-
-
Click Continue.
The Volume screen appears.
Volume
Configure the root volume
- If you want your VM to use a default root volume:
- select Use default configuration.
- If you want to customize the system volume of your VM:
- select Customize the root volume configuration.
- select one of the following values from the Volume type list:
- Magnetic for a Magnetic volume
- SSD for a Performance volume
- SSD premium for an Enterprise volume
infoIf you select SSD premium, you must define the number of IOPS (Input/Output Operations Per Second) you need.
- in the Volume size field, specify the volume size (in GiB).
note
Note that the minimum volume size is 10 GiB and the maximum size is 14901 GiB, subject to your quota. Make sure to choose a volume size suited to your storage and cost needs.
- Click Continue.
The security group screen appears.
Rules associated with the security group
You have a choice of three options:
-
Continue with the VPC security group
This option lets you use the default security group associated with your VPC. -
Select one or more existing SGs
This option lets you select one or more existing security groups. -
Create a new security group
- in the Security group name field, type a name for the security group.
info
- the name must be unique.
- the security group name must not start with "sg-".
- each name and description can contain between 1 and 255 characters. The allowed characters are a-z, A-Z, 0-9, space and _.-:/()#,@[]+=&;{}!$*.
- in the Description field, enter a description. Briefly describe the purpose of your security group.
- in the Security group name field, type a name for the security group.
-
Click Continue.
The Keypair screen appears.
Key pair
You have a choice of three options:
-
Select an existing key pair.
Choose an existing key pair to connect to your VM.warningOnly RSA-format key pairs can decrypt the password of a Windows VM.
-
Create a new key pair
- in the Key pair name field, type a name for the key pair.
info
- the key pair name must be unique within your account.
- it must contain between 1 and 255 printable ASCII characters
successYou can download the private key at the last step of the VM creation.
- in the Key pair name field, type a name for the key pair.
-
Continue without a key pair.
This option lets you create a VM without a key pair.warningYou can create a VM without associating a key pair with it. However, all official images use key pairs as their authentication system. If you want to access a VM created from an official image, you must associate a key pair with it during this step or later via the API.
-
Click Create the VM.
The Creation screen appears.
Creation of the VM
-
The resources to be created according to the selected options are automatically created and attached to your VM in sequential order.
-
If you chose to create a key pair, you must download the private key before leaving the creation screen.
warningSave this file carefully, as you will need its contents every time you connect to your resources. It cannot be recovered from Numspot if lost.
-
The screen displays the progress of the VM creation.
-
A summary of the selected options appears on the right-hand side of the screen.
-
It includes:
- the chosen image, the VM type, the general information (VM name, dedicated VM tenancy, etc.), the network (VPC and subnet), the volume (size and type), the security group and the key pair.
- the summary also displays the total estimated cost of the VM, based on the selected options.
-
When the creation is complete, you can return to the list of VM.
2. Create the resources needed for the VM
Internet Gateway
To be able to connect the VM to the internet, you must attach an internet gateway to the VPC.
In the left-hand menu, click Network → VPC then Internet Gateways to access the list of internet gateways.
Click Create an Internet Gateway, enter a name, then click Create:
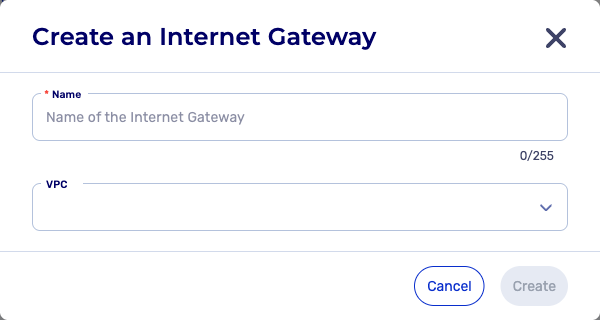
The internet gateway is created.
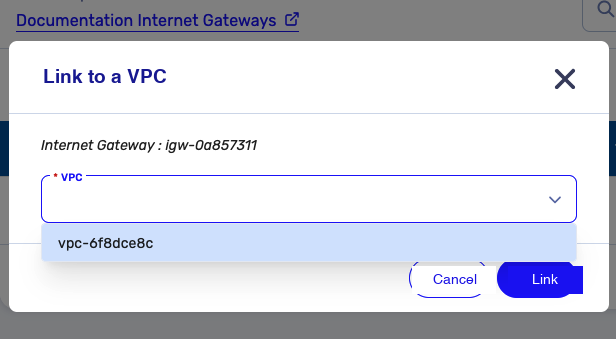
You must now attach it to the VPC in which the VM resides. To do this:
- click the Action menu to the right of the row, select the Link to a VPC option

- choose, from the drop-down list, the VPC to link:
Public IP
To be able to connect the VM to the internet, it must have a public IP address. To do this:
- in the left-hand menu, click Network → Public IP to access the list of public IP.
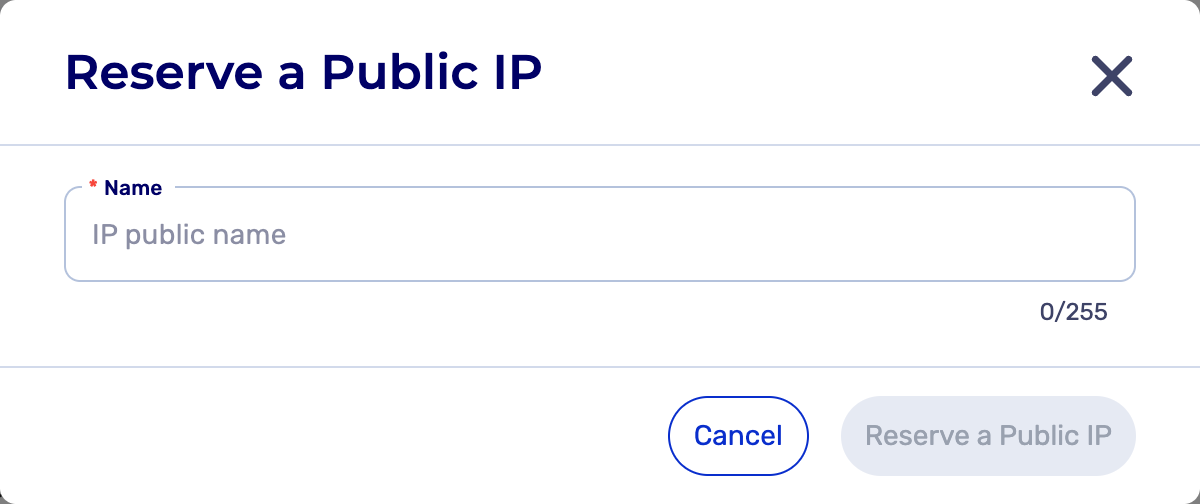
- Click the Reserve a public IP button.
- In the field that appears, specify a name for the public IP.
- Finally, click the Reserve a public IP button.
You must now associate the reserved public IP with the VM:
- Click the Action menu to the right of the row
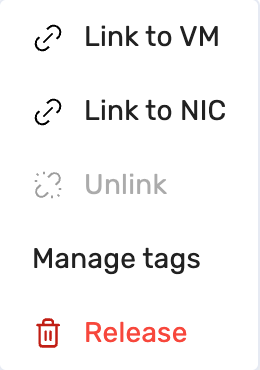
- Select the Associate with the VM option,
- In the panel that opens, select the identifier of the VM concerned,
- Click Associate with the VM
- The link established by default between the public IP and the VM is ephemeral. It is destroyed each time the VM restarts.
- If you want the link to be permanent, you must tick the Automatically associate the public IP on VM start. option.
Route table
For the VM to be able to access the internet, you must add a route in the route table linked to the subnet in which the VM resides. To add the route, click the Routes property, then click Add a route

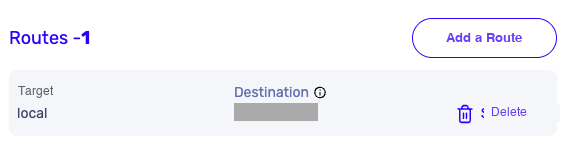
The route addition panel opens. The route you add must:
- have Internet Gateway as its type
- have, as its target, the internet gateway configured previously (to be selected from the drop-down list)
- have 0.0.0.0/0 as its Destination IP
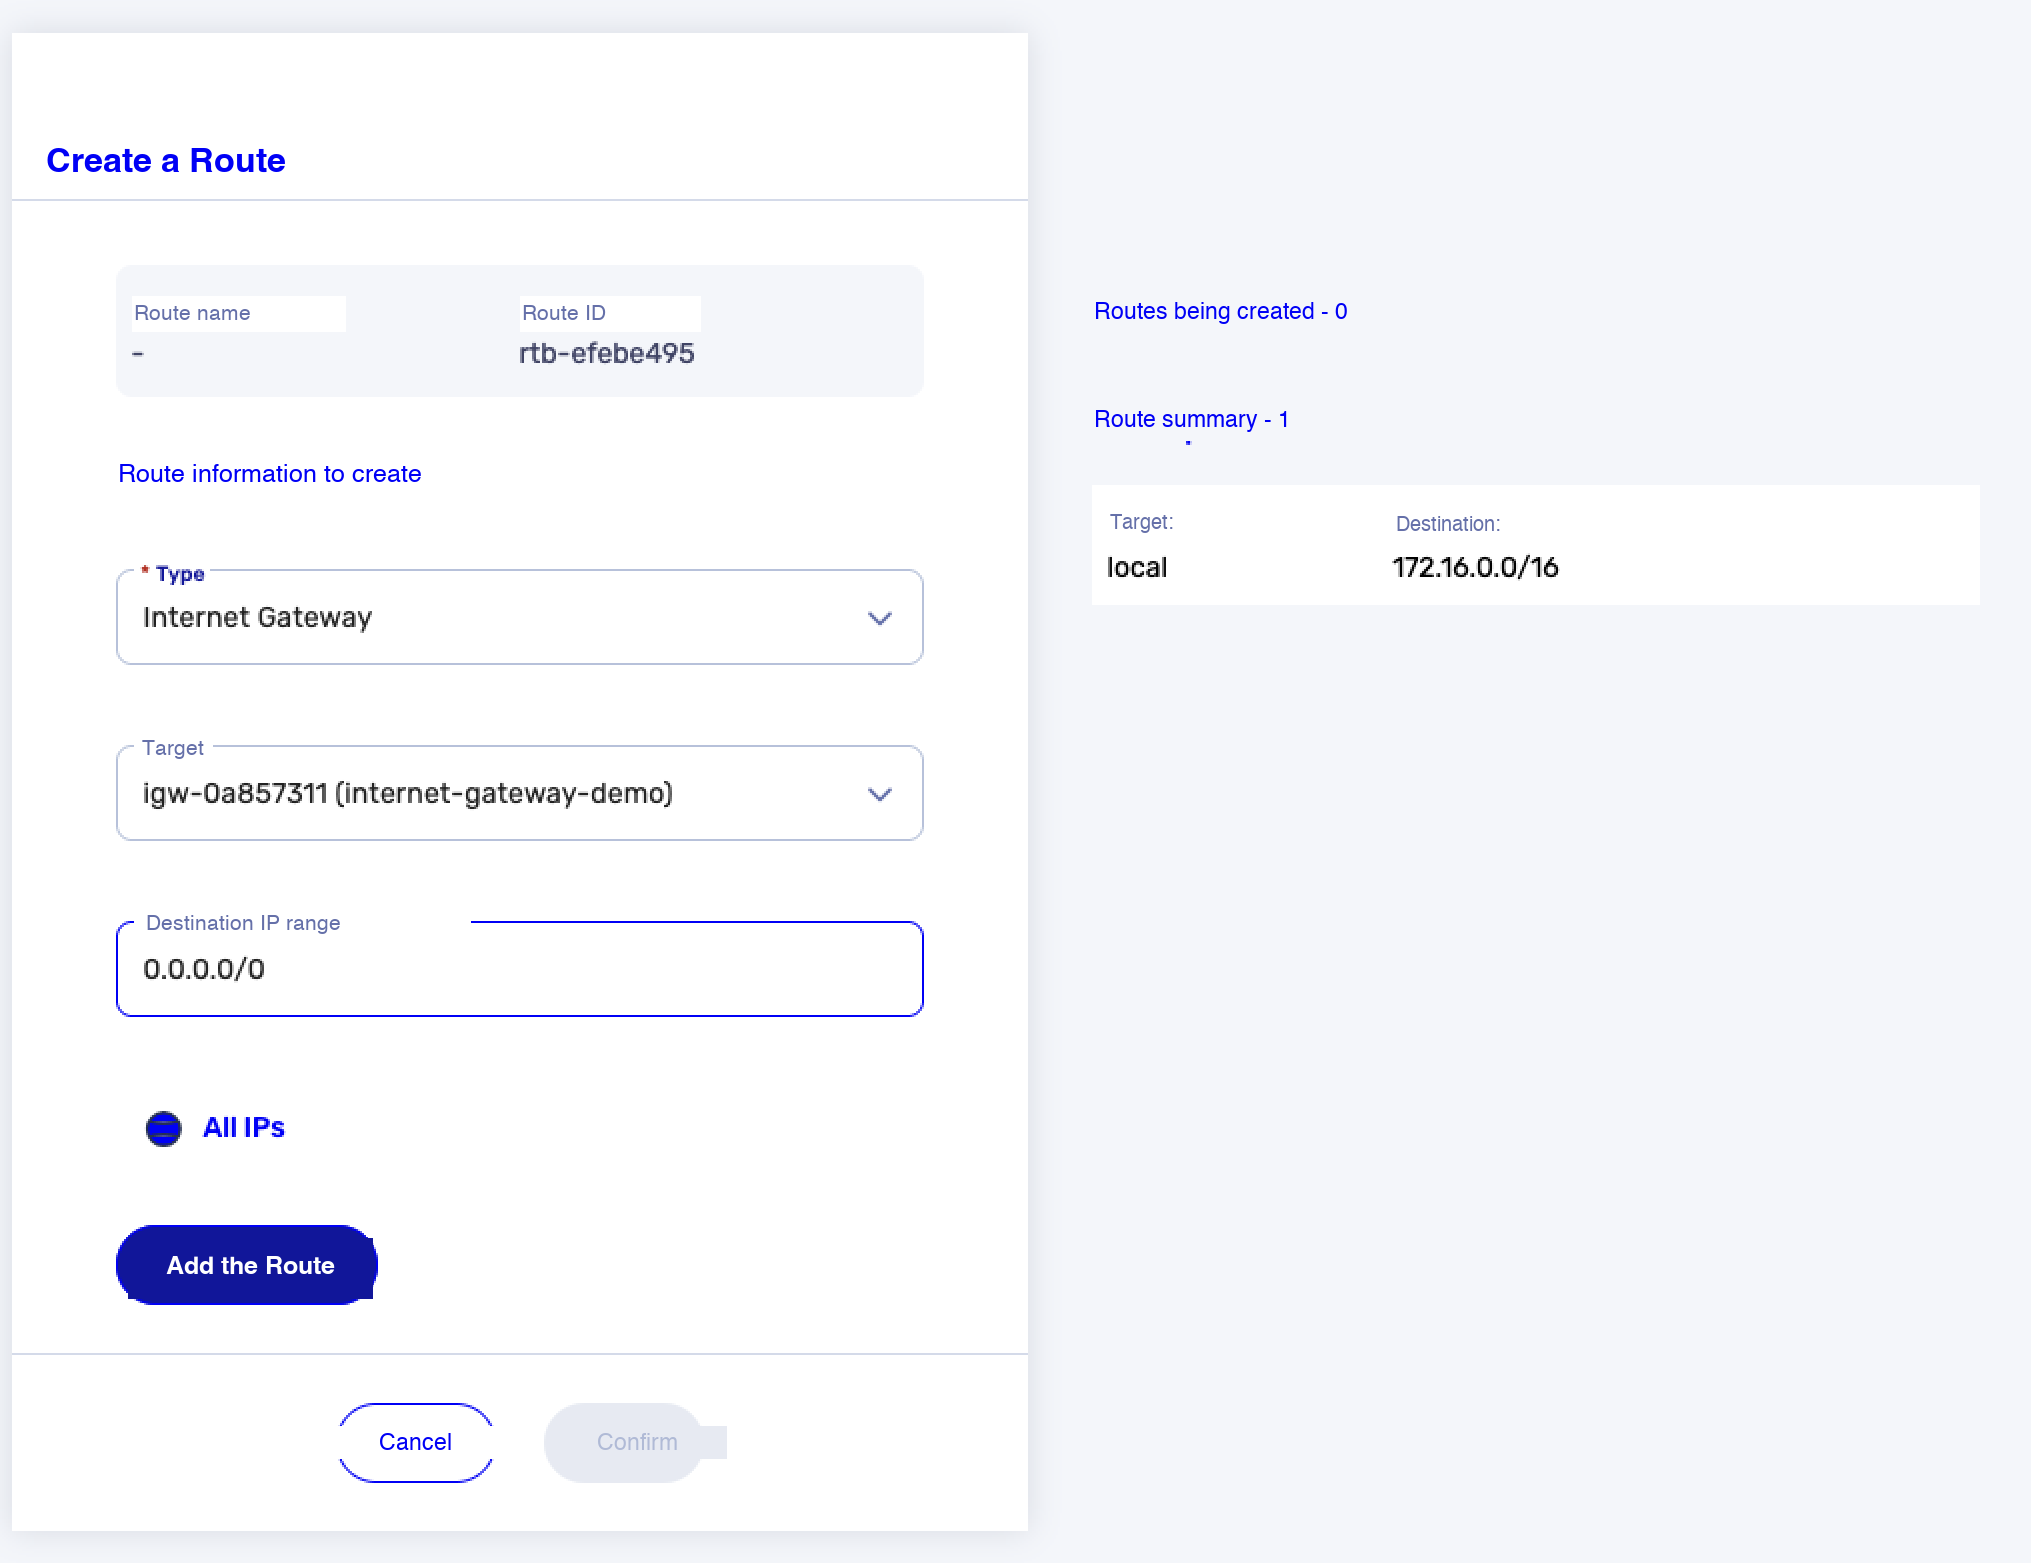
To save the changes, click Add the route then Confirm.
Security group
To be able to connect to a VM using SSH from the internet, you must allow the inbound connection on the security group assigned to the VM.
Go to the details screen of the VM:
- in the left-hand menu, click Compute → VM,
- in the list, select the VM you want to connect to by clicking its identifier,
- you now see the details screen of the VM, where you will find, at the bottom left, the security group associated with your VM. Click the identifier of the security group.
In the screen that appears, you can add a rule allowing inbound communications. To do this:
- Click Add a rule
- Indicate the targeted service in the Service field (here SSH),
- select the desired source type (My IP preferably).
- Click Confirm to finish the configuration.

The security group configuration can take a few minutes to be taken into account.
3. Connect to the VM
Once your VM is created, configured and running, follow the instructions corresponding to your operating system to connect to your VM.
- For Linux VM:
- identify the public IP address of your Linux VM.
- open a terminal (or a command window) on your local computer.
- make sure you have the private key matching the key pair you used when creating your Linux VM.
- change the permissions of the private key to ensure its security.
- connect to your Linux VM using the SSH command:
ssh -i <path/to/your/private_key> numspot@<public_ip_address_of_your_vm>
4. Delete a VM
When you no longer need a VM, you can delete it to release the associated resources.
- In the left-hand menu, click Compute → VM.
- Select the VM you want to delete
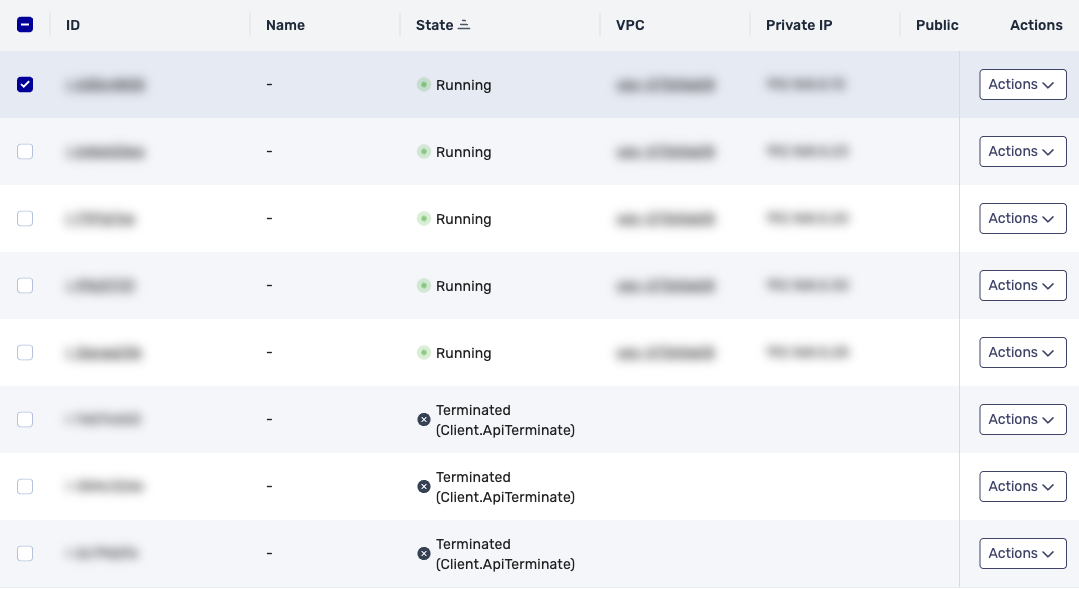 Tick the box of the VM you want to delete.
info
Tick the box of the VM you want to delete.
infoMulti-selection is available.
- Click the Delete button.
 warning
The "Delete" action is irreversible. If you confirm this action, the VM is permanently deleted, which causes the following consequences:
- the resources attached to the VM are released.
- the data stored in memory is erased.
- if a public IP is attached, it is released but remains allocated to the account.
- the behavior of block storage volumes depends on the block device mapping.